Install and sign in
Add FlowPaste to Chrome
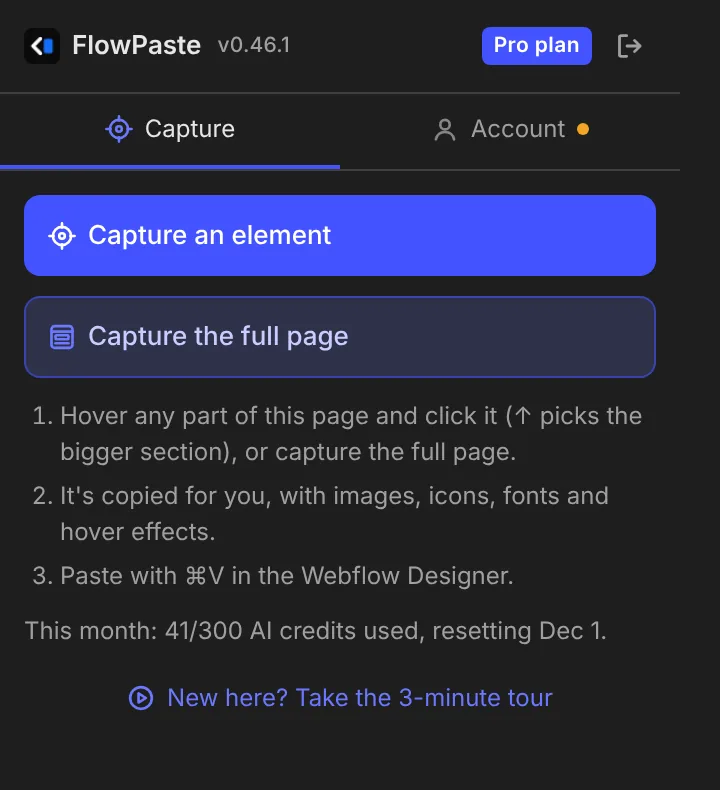
Click Add to Chrome, then pin FlowPaste: the puzzle icon in Chrome's toolbar → the pin next to FlowPaste.
Sign in
Click the FlowPaste icon → Sign in / connect. Sign in with Google or an email code; the extension connects by itself.
Take the 3-minute tour (optional)
The popup offers a short tour: capture a real section, paste it and see the panel.
Copy a design from an AI builder
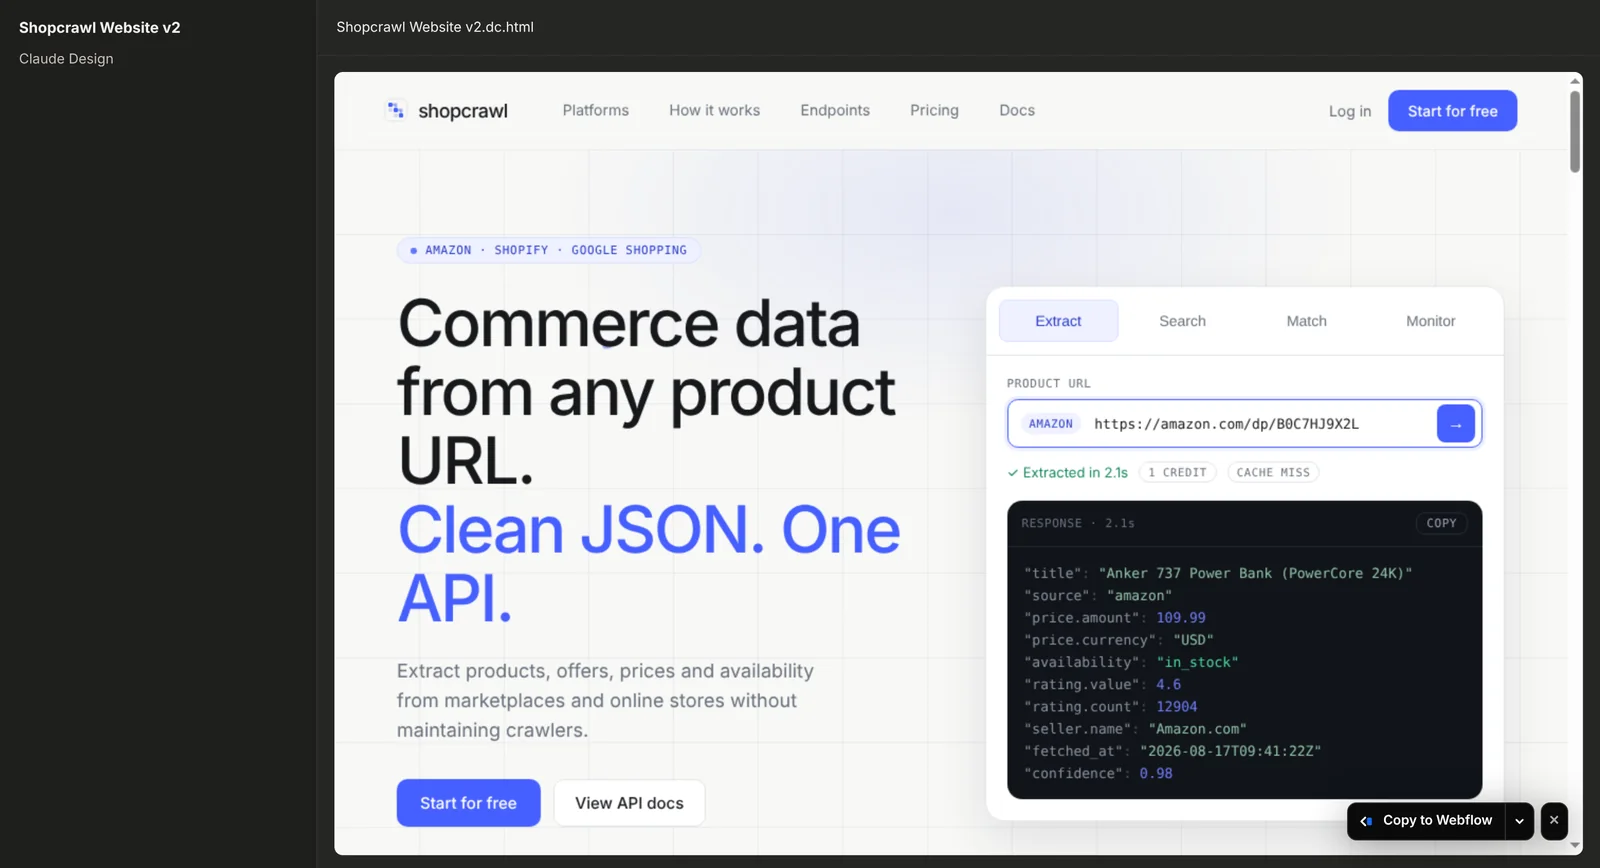
On Claude (Claude Design and artifacts), ChatGPT, Gemini, Google AI Studio, Lovable, Bolt, v0, Base44, Replit, Figma Make, Magic Patterns and other builders, FlowPaste adds a Copy to Webflow button next to the preview.
Open the design's preview
In Claude Design, Present → In this tab gives the widest preview, so the copy is laid out at desktop width.
Click Copy to Webflow
A design that scrolls like a page is copied section by section; a component that fits its frame is copied as one block. Use the arrow → Pick a section to copy one part.
Wait for the capture card
It shows what was copied and the check after capture (below). The copy is already on your clipboard.
Capture any website (Live Capture)
Live Capture copies a section, or a whole page, from any site you can open in Chrome.
Start a capture
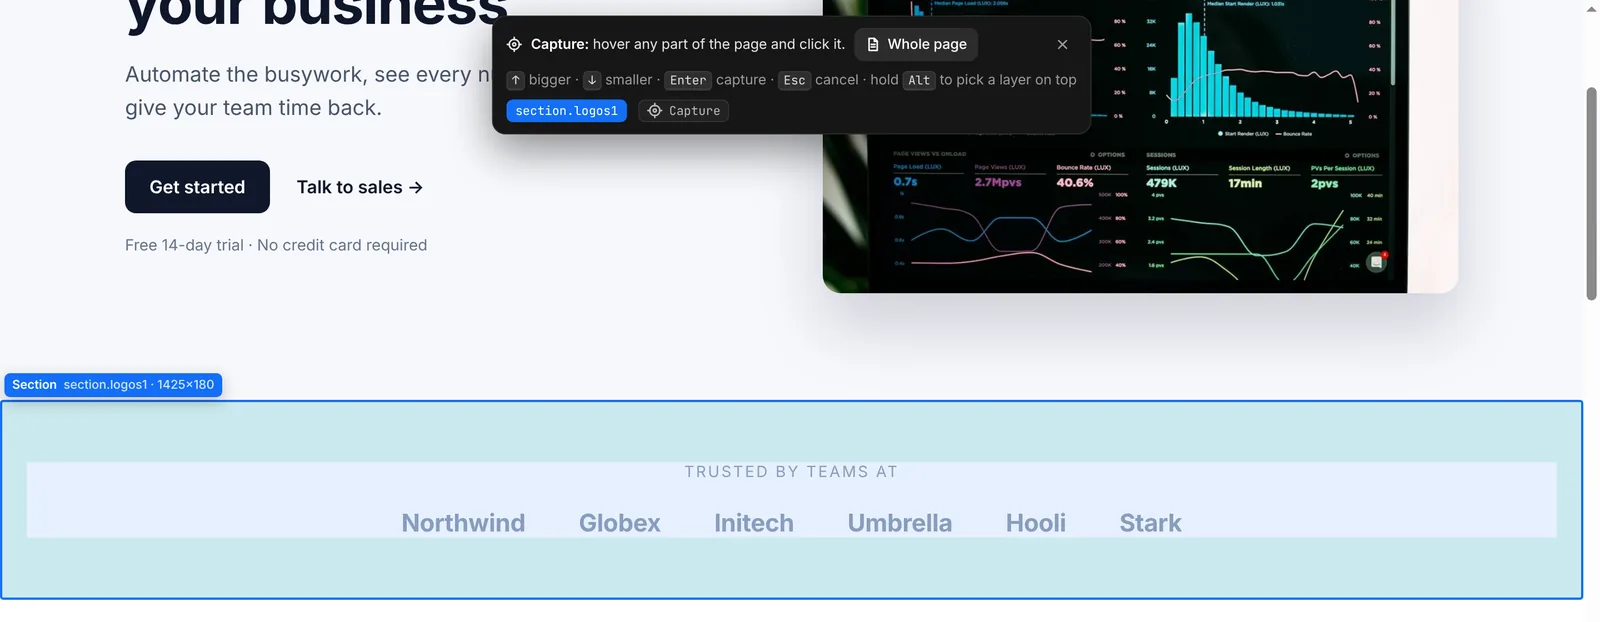
Click the FlowPaste icon → Capture an element or Capture the full page. Or press Alt+Shift+C, or right-click the page → Capture an element for Webflow.
Pick the part you want
Hover: the blue box shows what will be copied. ↑ picks the bigger section around it, ↓ a smaller part, hold Alt to reach a layer underneath. The breadcrumbs in the bar pick any parent. Click or press Enter.
Let it work
A full page is scrolled once so lazy images, animations and every section load. A picked section that animates as you scroll (stacked cards, pinned scenes) is scrolled through too, so its motion comes along. Esc cancels at any point and puts the page back as it was.

Some sites load their styles from other domains. If FlowPaste asks to Allow site access, allowing it gives the copy its hover and responsive styles; without it, styles are copied as they look on your screen right now.
The capture card
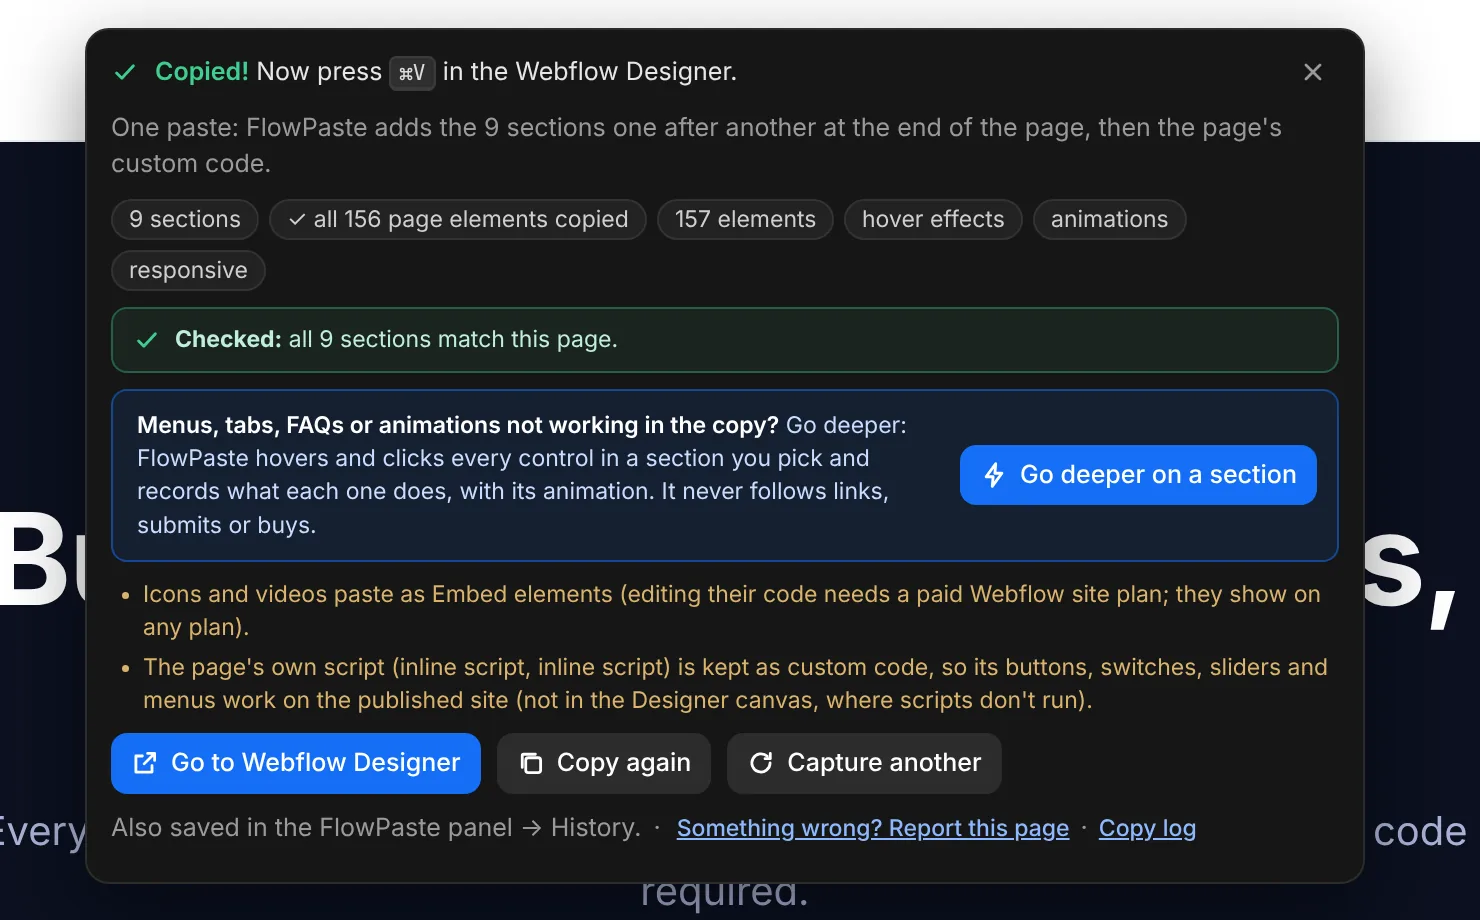
- Copied! The copy is on your clipboard: press ⌘V (Ctrl+V) in the Designer. Copy again puts it back if you copied something else meanwhile.
- The chips count sections, elements, images, icons, fonts, and whether hover effects, animations and breakpoints came along.
- The notes say what needs you in Webflow: fonts to add, breakpoints Webflow doesn't have, parts kept as code.
- An amber box about images means they still point to the original site: connect Webflow images before you publish.
- Go to Webflow Designer jumps to an open Designer tab. Every capture is also saved in the panel → History.
Check after capture
Before you paste, FlowPaste lays the copy out the way Webflow will publish it, at the same window size, and compares every section with the page you captured. It runs on your computer in a hidden extension page; nothing is sent for it.

- A section is listed when it differs by more than 10% (and 40px): a line wrapping differently doesn't count.
- Paste anyway: the rest is fine. Look at the listed section in the Designer and touch it up.
- Click Report this page so the conversion can be fixed for good (how reports work).
- Full pages and page-wide sections are checked. A small element is skipped, since it would be laid out at another width.
Paste into Webflow
Open the Designer
Open the page you want in the Webflow Designer.
Choose where it goes
One element pastes after the selected element (select Body to add it at the end). A full page always goes to the end of the page, section by section, in order, then the page's custom code.
Press ⌘V (Ctrl+V)
FlowPaste pastes it for you. A card shows straight away and fills as Webflow adds the elements (a large section takes a few seconds). Class names your site already uses are renamed (
-b,-c…) so they keep their own styles, and every animation gets its own name so Webflow keeps it.
Check after paste
Right after a FlowPaste paste, the Designer note counts what Webflow actually added: the elements on the canvas and the classes in the site's styles.
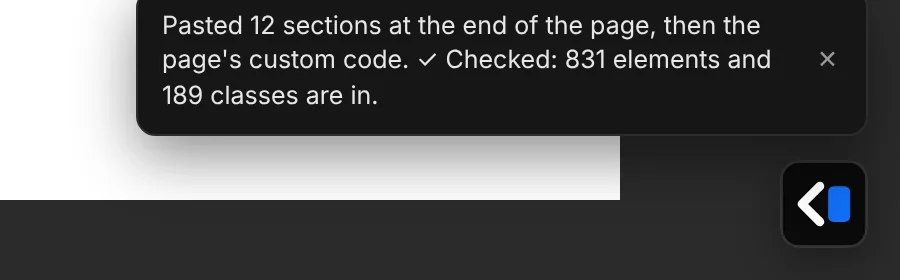
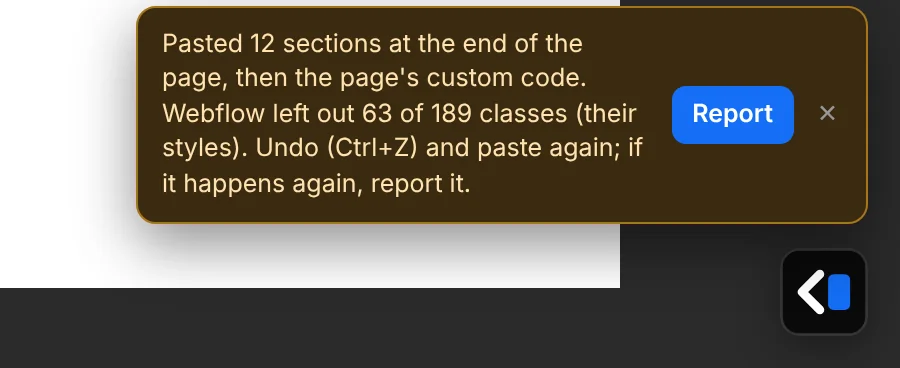
The result also shows in the panel → History next to the copy (Pasted, all in or Paste incomplete). Animations can't be seen on the canvas: check them on the published page with Check your live site.
The Designer panel
In the Webflow Designer, FlowPaste adds a small button in the bottom-right corner. Click it (or press Alt+Shift+F) to open the panel. Drag the button to move it. The panel has five tabs: Convert, AI, Library, History and Account.
Convert code
Paste your code
HTML, CSS and JavaScript in their own fields, or all in one. Tailwind, GSAP and React (JSX) work too; Open file takes an .html file or a project .zip (a Claude Design export, a Vite or Next project).
Check the options
Match my site uses the open site's fonts and colors; Match browser defaults keeps the original look; Client-First class names names classes like
hero_heading; Keep unconvertible code as an Embed keeps the rest as custom code.Click Convert & copy, then paste
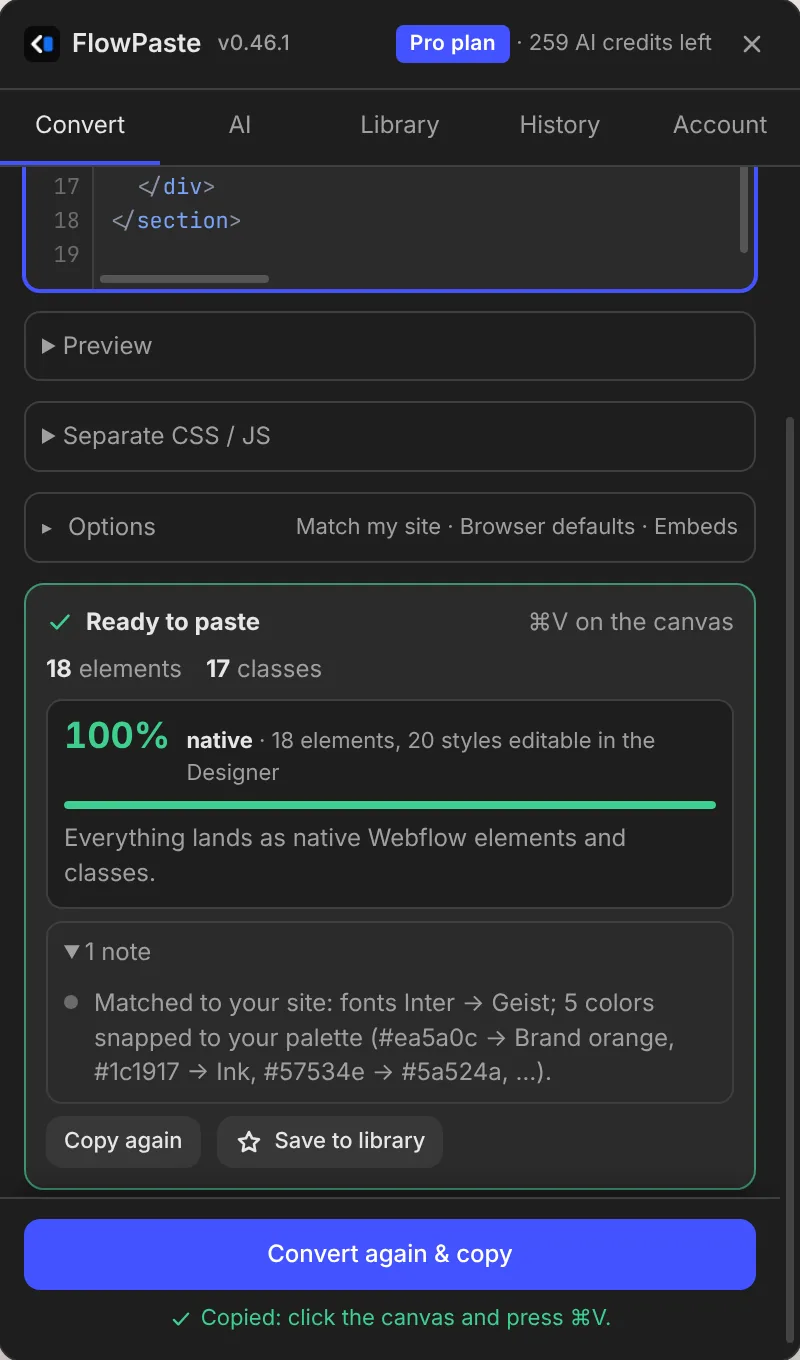
The result says how much became native Webflow, what changed and what's kept as code. Fix with AI rewrites the parts that didn't convert.
AI sections and edits (Pro)
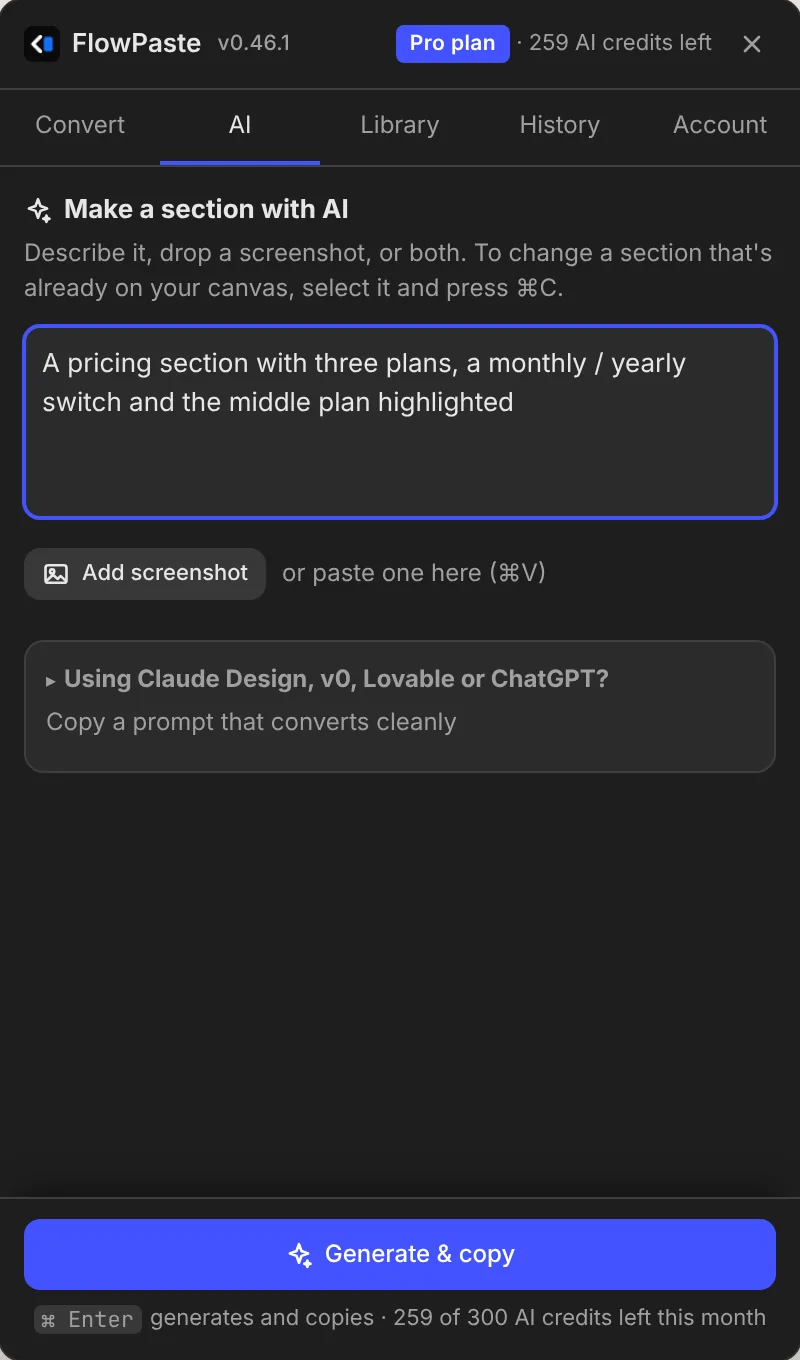
- Make a section: describe it, drop a screenshot, or both, then Generate & copy. It uses your site's fonts and colors.
- Change a section on the canvas: select it in the Designer and copy it (⌘C or Ctrl+C), or click the sparkle bubble that appears after a copy. Describe the change; the edit keeps its classes and changes only what you asked.
- Prompt kit: using Claude Design, v0, Lovable or ChatGPT? Copy a prompt that makes code that converts cleanly.
- A simple section uses 1 AI credit; bigger ones and edits up to 6. Pro includes 300 credits a month.
Library
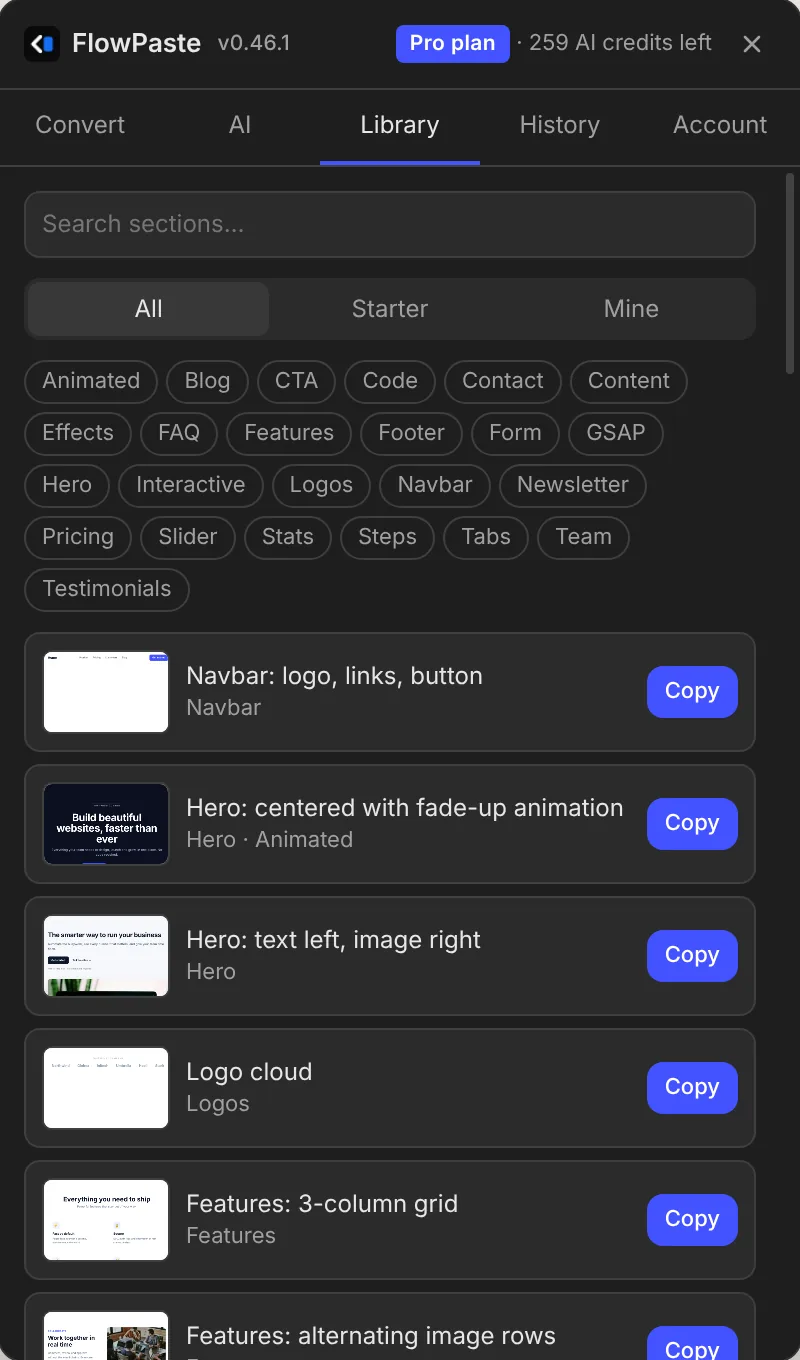
- Starters: 47 ready sections (navbars, heroes, pricing, FAQ, sliders, GSAP effects). Filter by tag, click Copy, paste.
- Mine (Pro): anything you save with the star (from Convert, AI or History), kept in your account and on every computer.
History and Copy without CMS
- History keeps your last 25 conversions and captures. Copy puts one back on the clipboard; full pages paste section by section again.
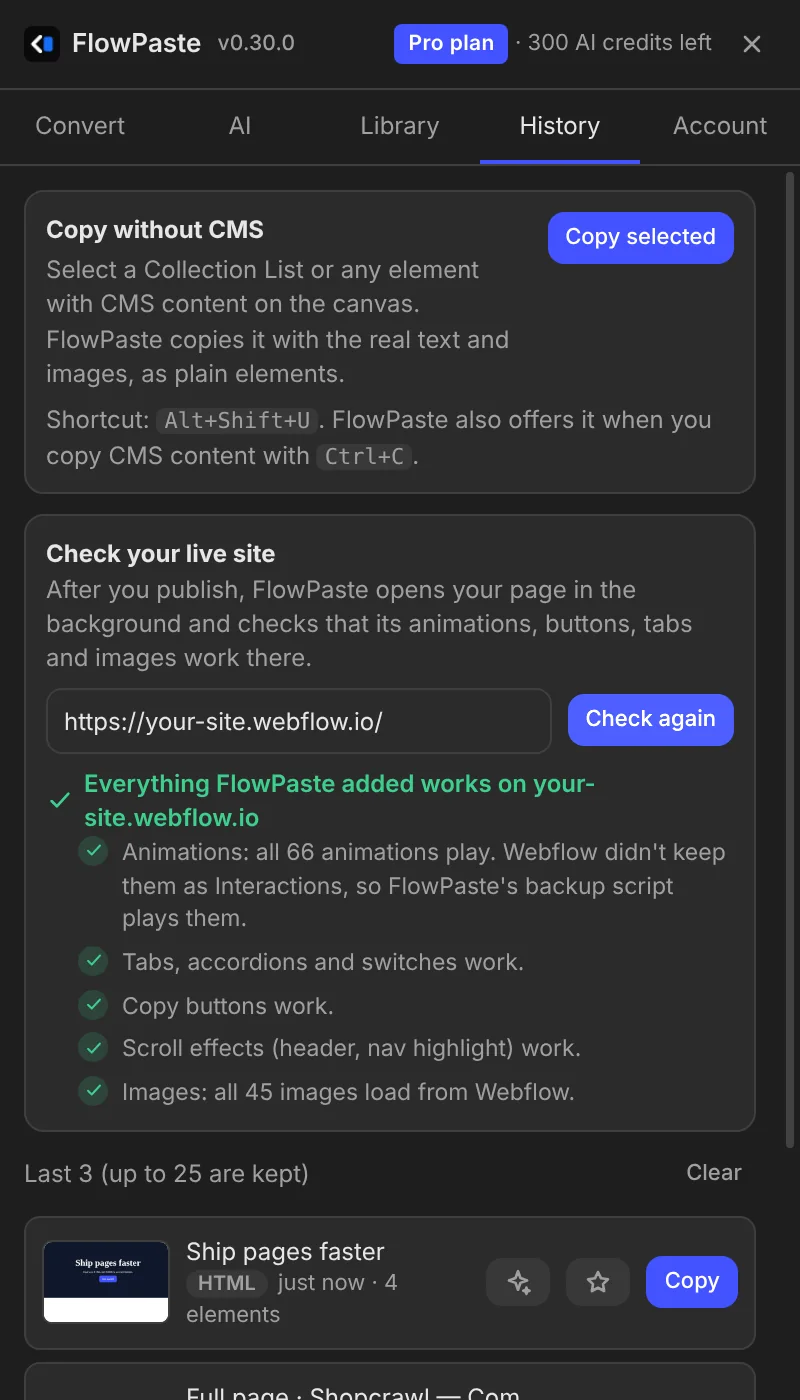
- Copy without CMS: Webflow's own copy empties Collection Lists. Select one on the canvas and click Copy selected (or press Alt+Shift+U): FlowPaste copies it with its real text and images, as plain elements.
Clipboard history: every Webflow copy, kept
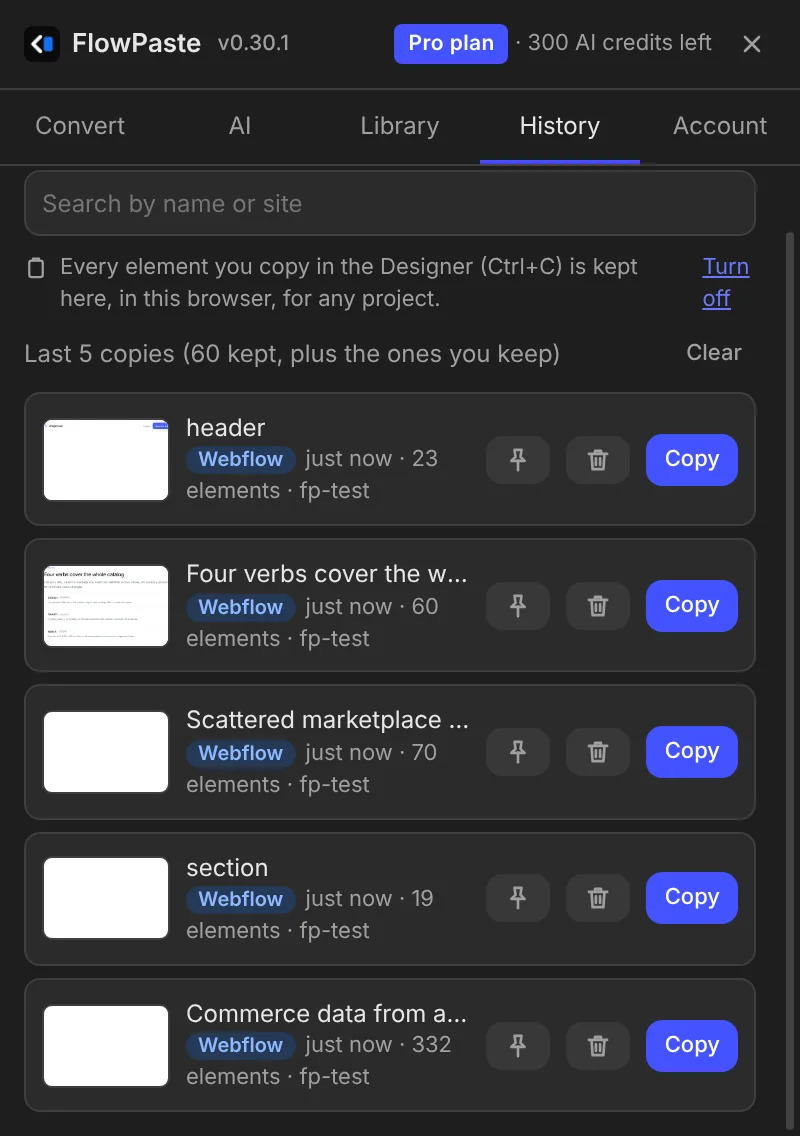
Every element you copy on the canvas with ⌘C (Ctrl+C) is kept in the panel → History → Webflow copies: sections with all their children, components, anything. Copy it again later, in this project or another, without going back to find it.
Copy as usual
Select an element on the canvas and press ⌘C (Ctrl+C). Nothing else to do: it's saved with its name, the site it came from and how many elements it holds.
Find it later
Panel → History → Webflow copies. Search by name or site. The newest is on top; copying the same element again moves it up.
Copy and paste
Click Copy, then click the canvas and press ⌘V (Ctrl+V). It pastes exactly like the original copy, so classes your site already has are reused, not renamed.
- The last 60 copies are kept; the pin keeps one for good (it isn't pushed out by new copies or cleared).
- Copies stay in this browser and are never sent anywhere. Turn saving off (or on) with the link above the list.
- A copy with CMS content pastes like Webflow's own copy, without the CMS items: use Copy without CMS to keep them.
Check your live site
Publish your site
Publish from the Designer as usual.
Open the panel → History
The Check your live site card has your site's webflow.io address filled in. Change it to the page you pasted into, or to your own domain.
Click Check
The first time, Chrome asks to let FlowPaste open that site. FlowPaste opens the page in a background tab, reads it for a few seconds and closes it.
It reports the animations (how many Webflow runs and how many FlowPaste's backup script plays), tabs, accordions and switches, copy buttons, scroll effects, and images that still load from other sites or didn't load. The result stays on your computer.
Webflow images
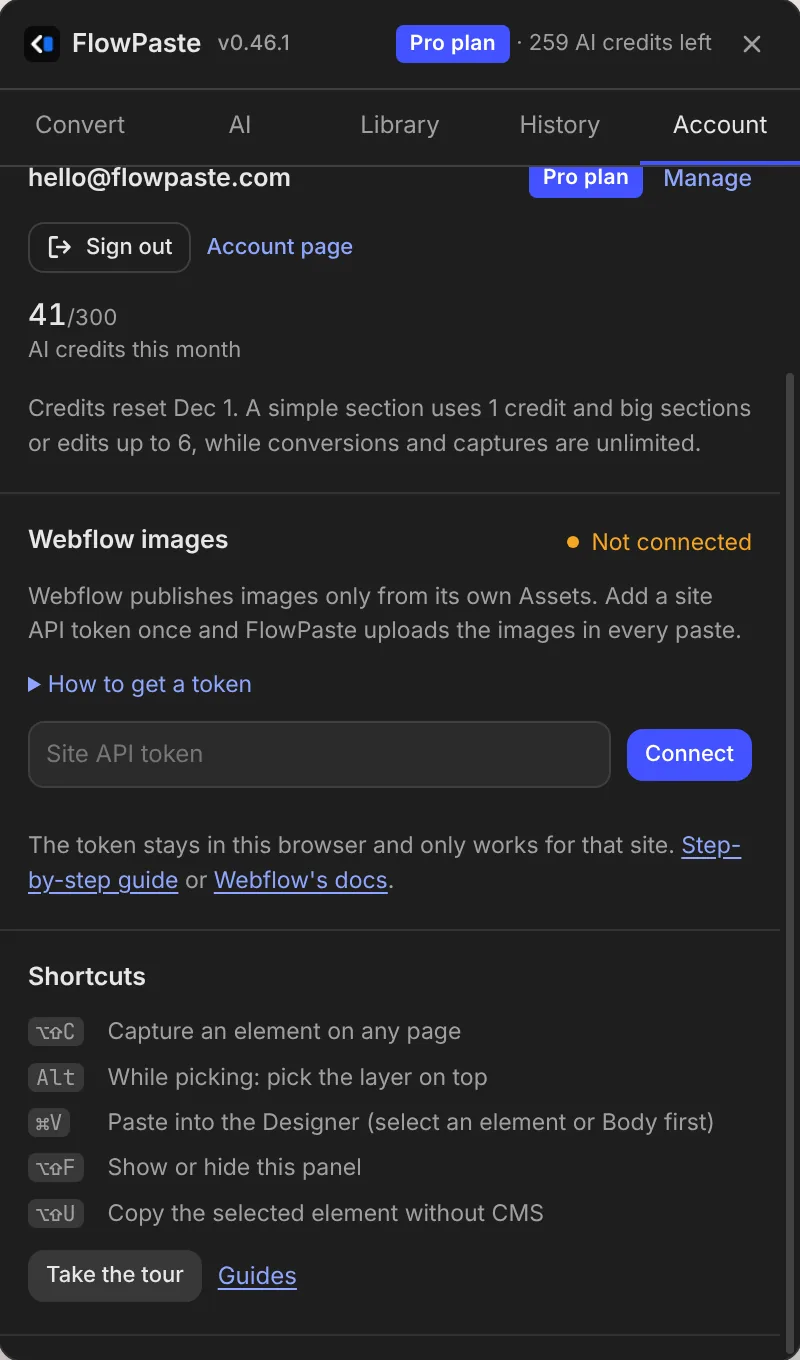
Webflow only publishes images from its own Assets. Connect your site once and FlowPaste uploads the images of every capture and conversion to it.
Get a site API token
In Webflow: Site settings → Apps & integrations → API access → Generate API token (Assets: Read and write, Sites: Read-only). Step-by-step guide.
Connect it
Panel → Account → Webflow images: paste the token and click Connect. Allow site access when asked, so FlowPaste can download the images.
Capture again
From now on, images upload by themselves. The token stays in your browser and only goes to Webflow.
What runs on the published site
FlowPaste turns what it can into native Webflow: elements, classes, breakpoints, hover states and Interactions. What Webflow can't hold natively keeps working through a small script in the page's custom code, pasted last:
- Tabs, accordions, FAQ lists, switches (monthly / yearly prices), dialogs, button groups, copy buttons.
- Sliders, marquees, typewriters, count-ups, custom cursors, smooth scrolling.
- Headers that change on scroll, back-to-top buttons, the nav link of the section on screen, progress bars.
- A backup for reveals and scroll scenes: if Webflow drops an Interaction, the script plays it instead.
Webflow doesn't run custom code on the Designer canvas, so these move on the published site (and in Preview where Webflow allows it), not while you edit. Keep the custom code section on the page.
Report a page
When a copy comes out wrong, a report with the page itself lets us reproduce it exactly, add it to our test pages and fix it for everyone.
Click Report this page
At the bottom of the capture card (Something wrong? Report this page), in the amber check box, or on an error card.
Say what looks wrong (optional)
For example: “the pricing toggle doesn't switch”. The note helps us find it faster.
Click Send report
You get a reference (like
a1b2c3d4). Mention it if you email us.
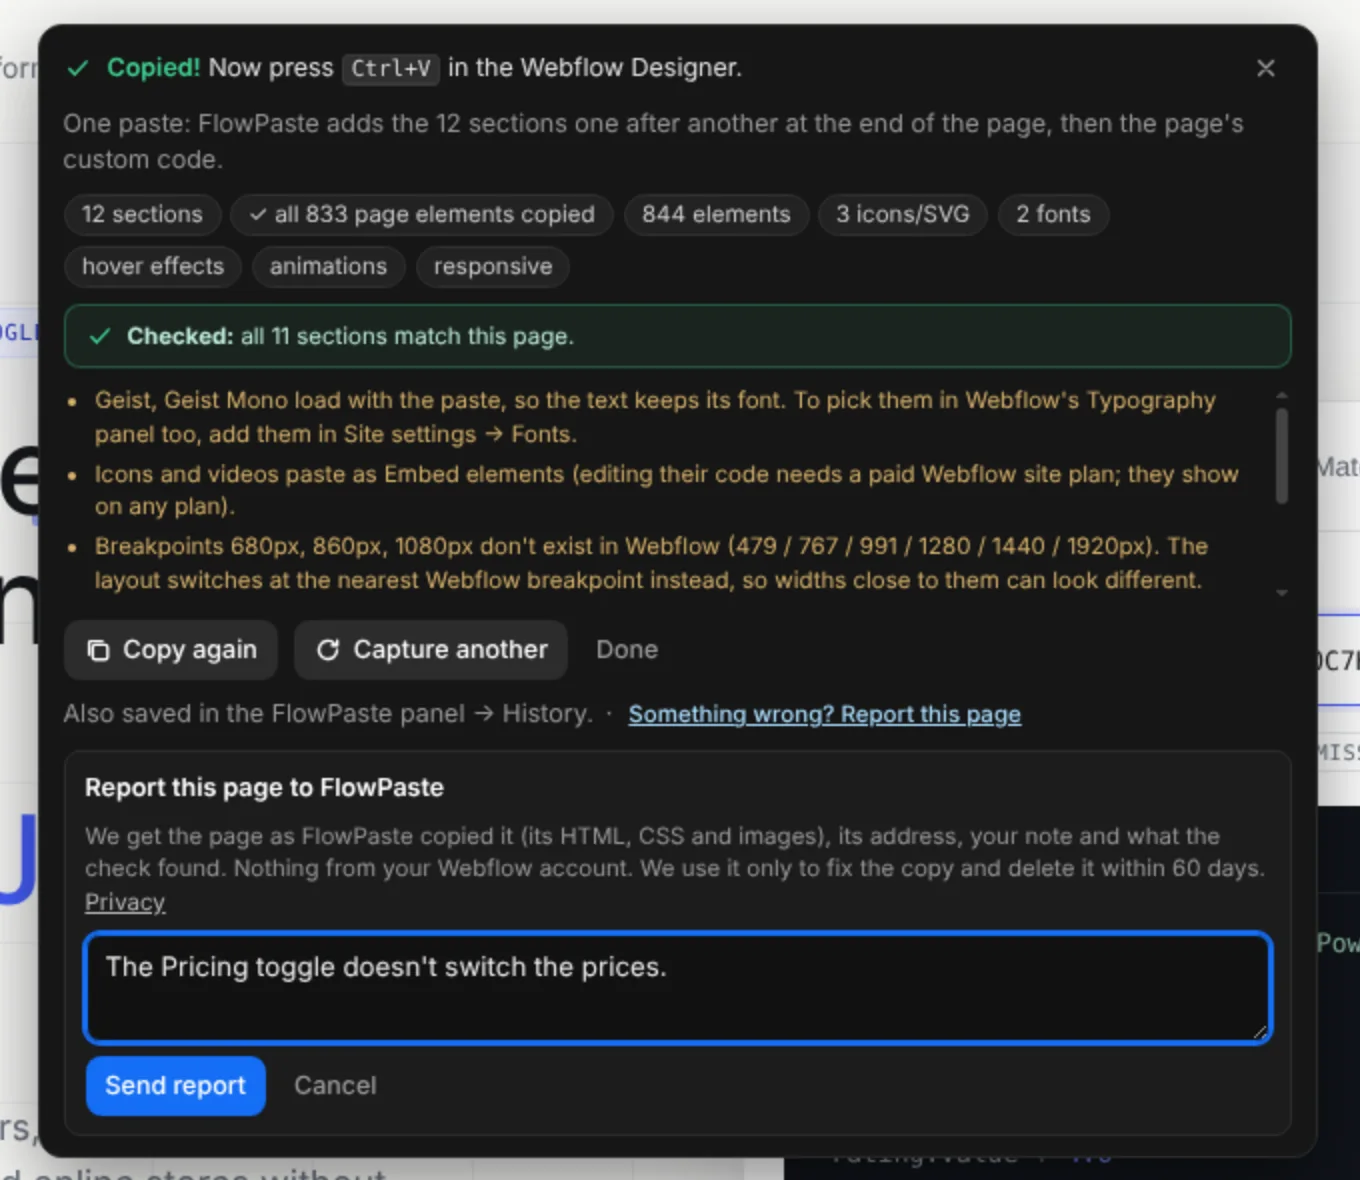

A report holds the page as FlowPaste copied it (its HTML, CSS and images), its address, your note and what the checks found. Never anything from your Webflow account. It's used only to fix the copy and deleted within 60 days (privacy policy). After a paste, Report on the warning sends the copy you pasted instead.
Keyboard shortcuts
| Keys | Where | What it does |
|---|---|---|
| Alt+Shift+C | Any page | Start Live Capture |
| ↑ / ↓ | While picking | Bigger / smaller part |
| Alt (hold) | While picking | Pick a layer underneath |
| Enter / Esc | While capturing | Capture / cancel (the page goes back as it was) |
| ⌘/Ctrl+V | Webflow Designer | Paste the copy |
| Alt+Shift+F | Webflow Designer | Show or hide the panel |
| Alt+Shift+U | Webflow Designer | Copy the selected element without CMS |
| ⌘/Ctrl+Enter | Panel | Convert, or generate with AI |
Free and Pro
- Free
- 3 free runs a day: 3 HTML conversions, 3 element captures or 1 full-page capture. Library saved in this browser.
- Pro
- Unlimited conversions and captures, AI sections and edits (300 credits a month), cloud library. $14.99 a month or $89.99 a year. Pricing
- Checks and reports
- On every plan: the check after capture, after paste, Check your live site and Report this page.
- Webflow plan
- Pasting works on any Webflow plan. Editing the code inside an Embed needs a paid Webflow site plan; Embeds show on every plan.
Troubleshooting
The panel says “FlowPaste was updated”. What do I do?
Chrome updated or reloaded the extension while the Designer tab was open. Reload the tab (Webflow saves as you go), and the new version opens.
My tabs, accordions or sliders don't work in the Designer.
They do on the published site. Webflow doesn't run custom code on the Designer canvas, so anything FlowPaste keeps working with a small script only moves after you publish. Use Check your live site to confirm.
Images show in the Designer but break on the published site.
Webflow only publishes images from its own Assets. Connect Webflow images in the panel (Account → Webflow images), capture again, and the images upload to your site automatically.
The text is in the wrong font.
The capture card lists the fonts the page uses. Fonts it could link load with the paste; for the others, add them in Webflow → Site settings → Fonts, under the same name.
The capture card says a section looks different. Is the copy broken?
Not always. The check lays the copy out like a published Webflow page and compares each section's height with the page. A section that is much taller or shorter usually means something converted differently. Click Show to see it on the page, fix it after pasting, and send Report this page so the conversion gets fixed for everyone.
The paste note says Webflow left out classes or elements.
Undo (⌘Z or Ctrl+Z) and paste again. A paste can fail when the Designer is busy or the page is very large. If it happens again, click Report on the note.
Copy to Webflow doesn't show on my AI builder.
Reload the builder's page once after installing or updating FlowPaste. If the preview still has no button, open the preview in its own tab and click Copy to Webflow there.
Does FlowPaste send my Webflow site to its servers?
No. FlowPaste converts the page or code you capture, and reads the open site's fonts and colors only for Match my site. A page report is sent only when you click Send, and it holds the page you captured, never your Webflow account.
Still stuck? Email hello@flowpaste.com with the page address, or send a report from the capture card.